


Hi ,
I will continue to tell SQL Server Failover Cluster Installation in this post.
Read first article as follow before this article read.
https://ittutorial.org/2019/03/15/sql-server-failover-cluster-installation-1/
Now I will tell you about the installation of SQL Server Failover Cluster on 2 different servers which is in the same windows cluster. Windows Cluster needs to be healthy in order for SQL Server Failover Cluster to work properly. Essential requirements for starting SQL Server Failover Cluster installation are as follows.
- Windows Cluster
- Shared Disk ( Quorum Disk )
- SQL Server Cluster IP (An IP that is independent of the physical IP of both servers. Applications This cluster will be able to access the database on both servers via IP.)
- Cluster Name / Network Name
- Administrator User (Authorized user on both servers)

2. In this step, click on the New SQL Server Failover Cluster Installation tab.

3. Click OK button to continue.

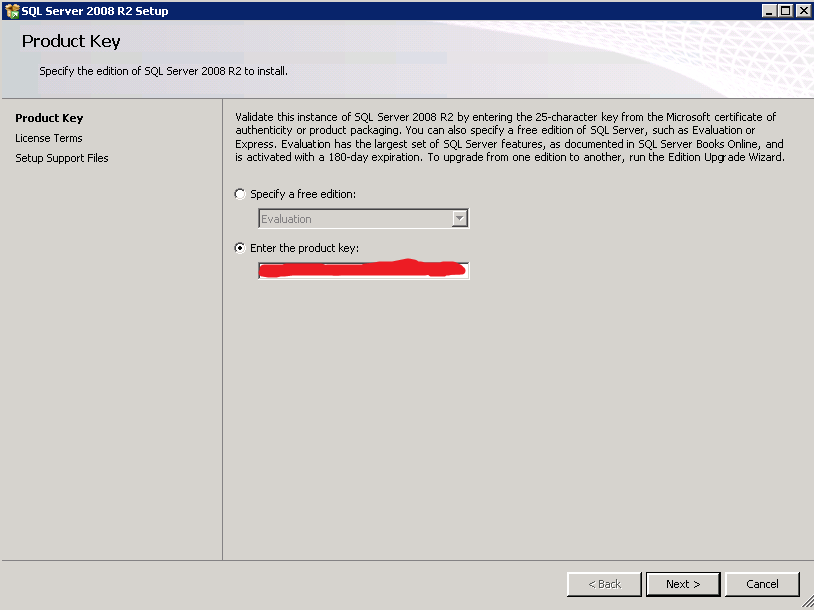
4.In this step, enter Product Key and go to Next.
5. click Next button to go on.

6. click Install button to go on.

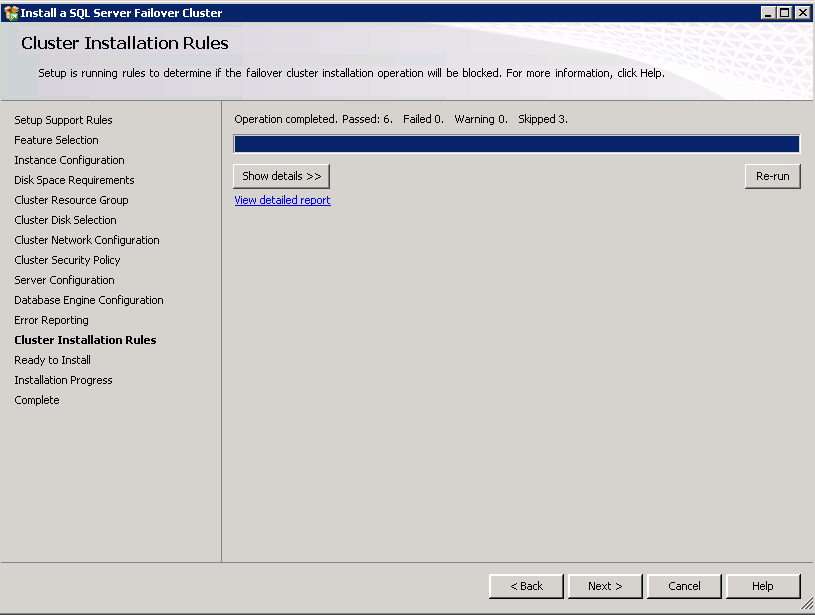
7. In this step, the System and Networks parameters for Installation are checked as follows. All of them are successful now, we can continue comfortably.

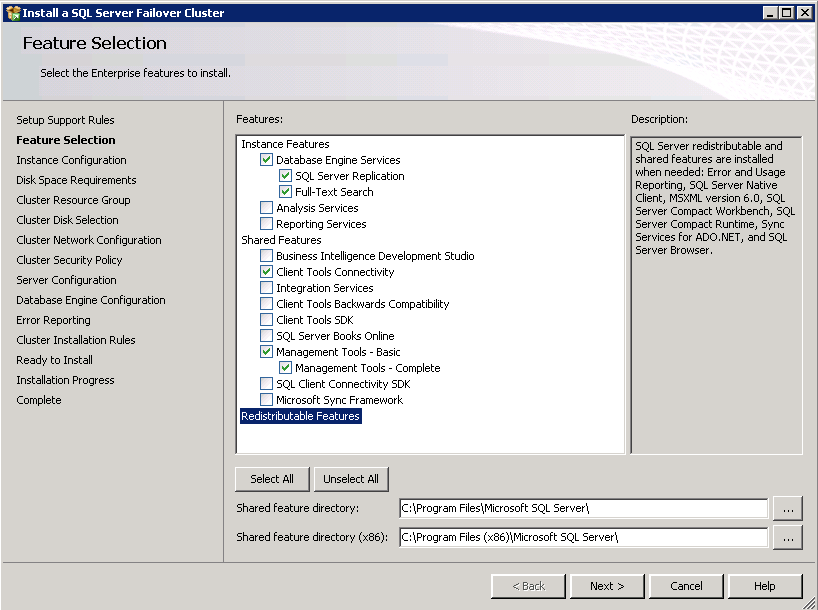
8. In this step I choose to install only the features that are required by me. If you do not need unnecessary load on the server do not install the features you do not need.
9. In this step, we are writing the Network Name in SQL Server as follows. Network Name also named as Cluster Name. In the same way, we determine the Instance Name in this step.

10. click Next button to go on.

11. In this step, we select the Resource Group required for the Cluster as follows.


13. In this step, we enter the pre-defined Cluster IP in the Address field indicated by Arrow. To do this, we need to click the DHCP tab for uncheck.

14. In this step, we proceed to Next without touching the tabs as follows.

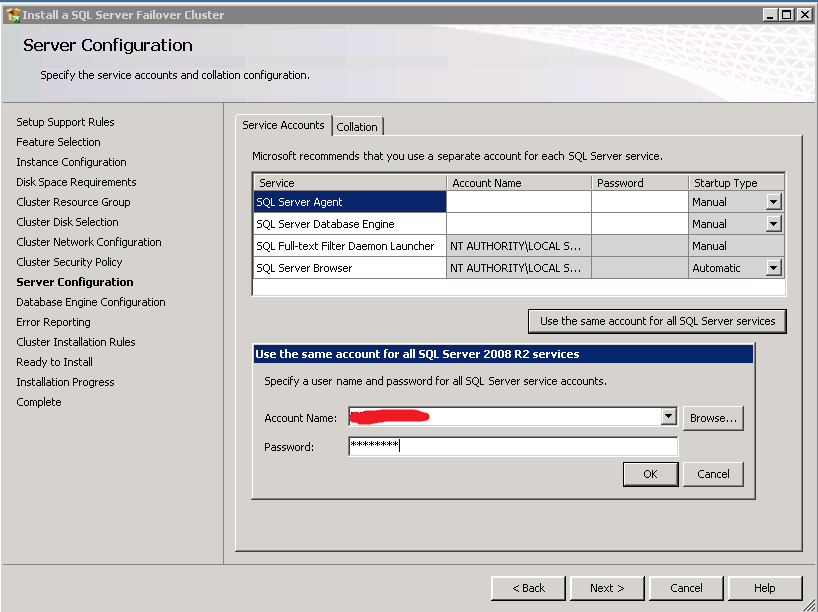
15. In the following 2 steps, we enter the account and password to run the Database and other services. This user needs to be a user with admin on both servers.

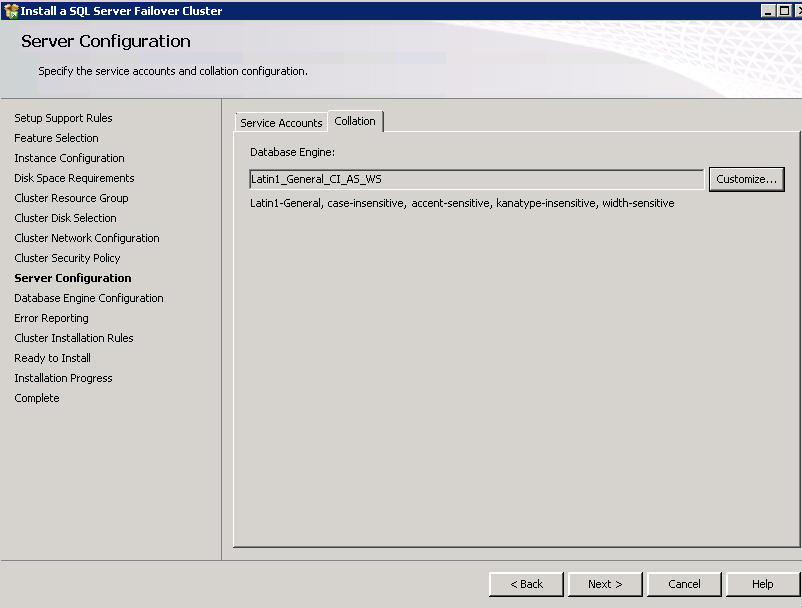
16. In this step we enter the character set. You have to make the character set according to application software.
You are specifying Database Admin users or groups in this step. By clicking on the Add Current User button, I choose myself as an admin.

18. In the following step, we enter the Data, Log, Backup and Temp data directory of our database. Hosting data, log, and Temp data on different disks is good for I / O traffic. If you have the possibility to host these data on different disks is also useful. If we can put data, log and temp data on different disks, we will gain a lot in terms of performance.

19. Bu adımda Next deyip geçiyoruz.
20. click Next button to go on.
21. click Install button to go on.
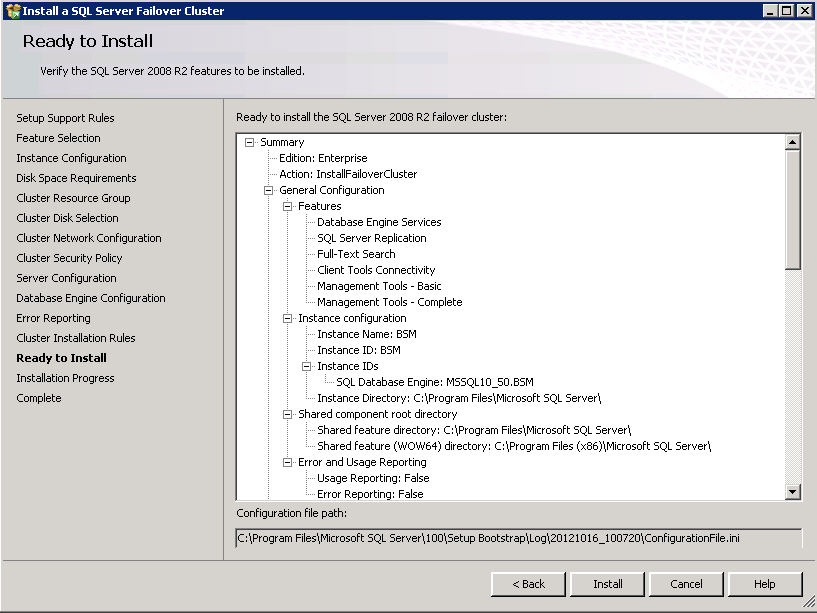
22. click Next button to go on.

As shown below, our installation has been completed successfully. If there was a nuisance on the Windows Cluster side or Network side, the installation could not be completed, so you need to make sure that these parameters are correct.

Do you want to learn Microsoft SQL Server DBA Tutorials for Beginners, then read the following articles.
https://ittutorial.org/sql-server-tutorials-microsoft-database-for-beginners/