

Hi,
I will continue to tell you step by step Microsoft SQL Server 2017 installation on Windows Server 2016 in this post.
Read first article before this post with following link.
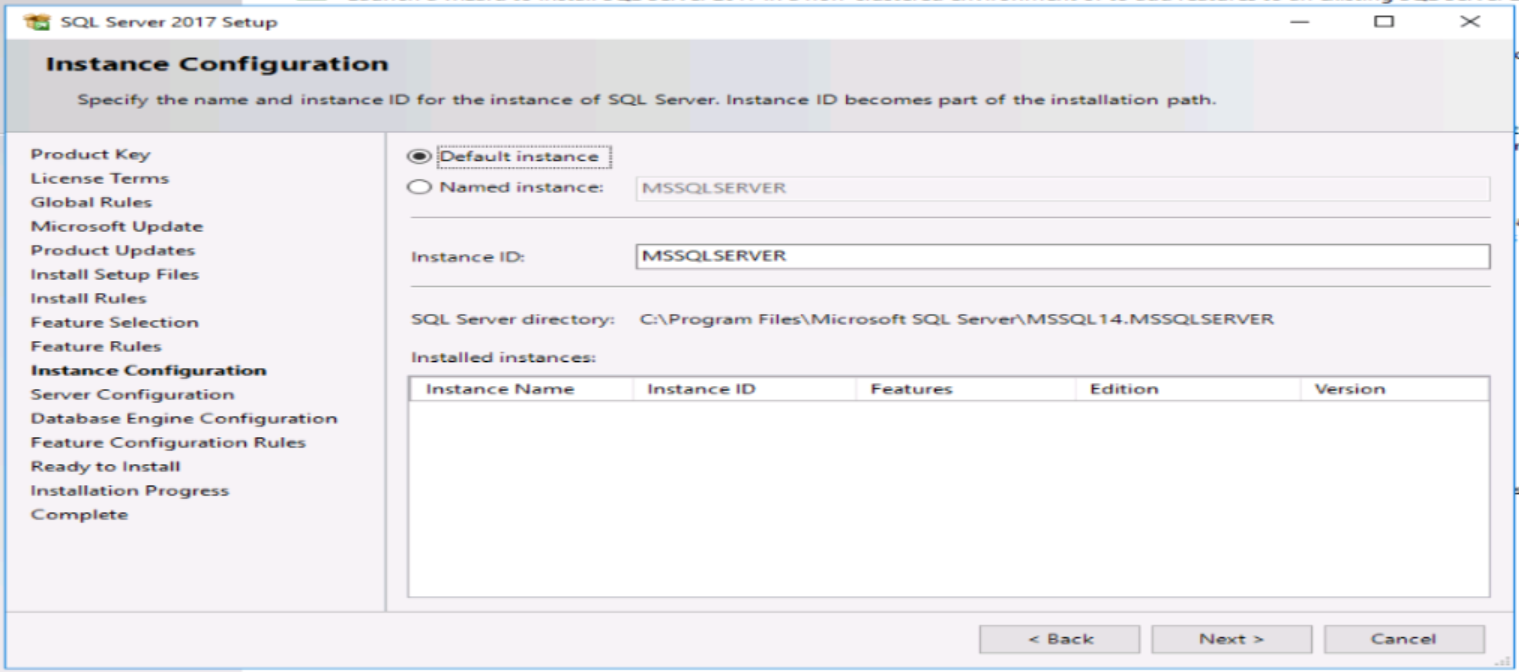
You should name SQL Server instance in this step. If you don’t name it, you can choose default Instance.

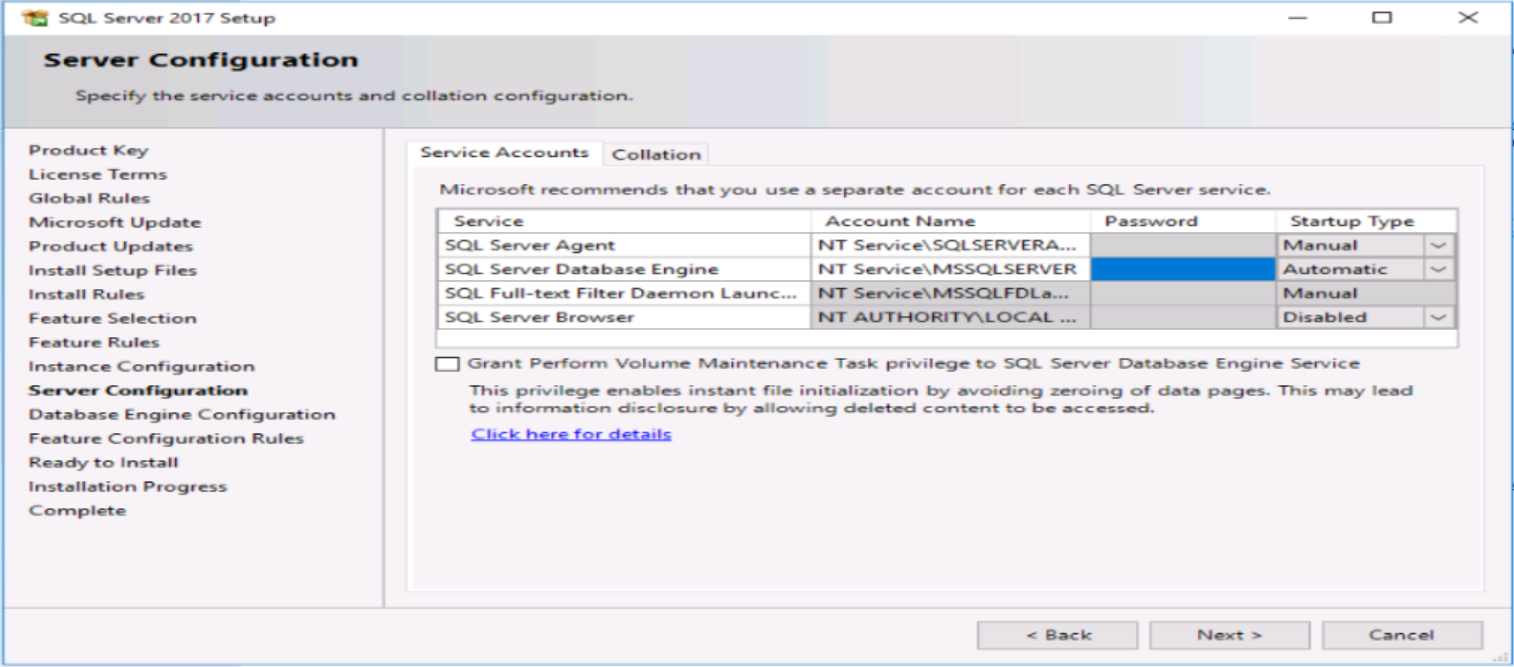
You should type account informations of SQL Server services and decide which account will run these services.

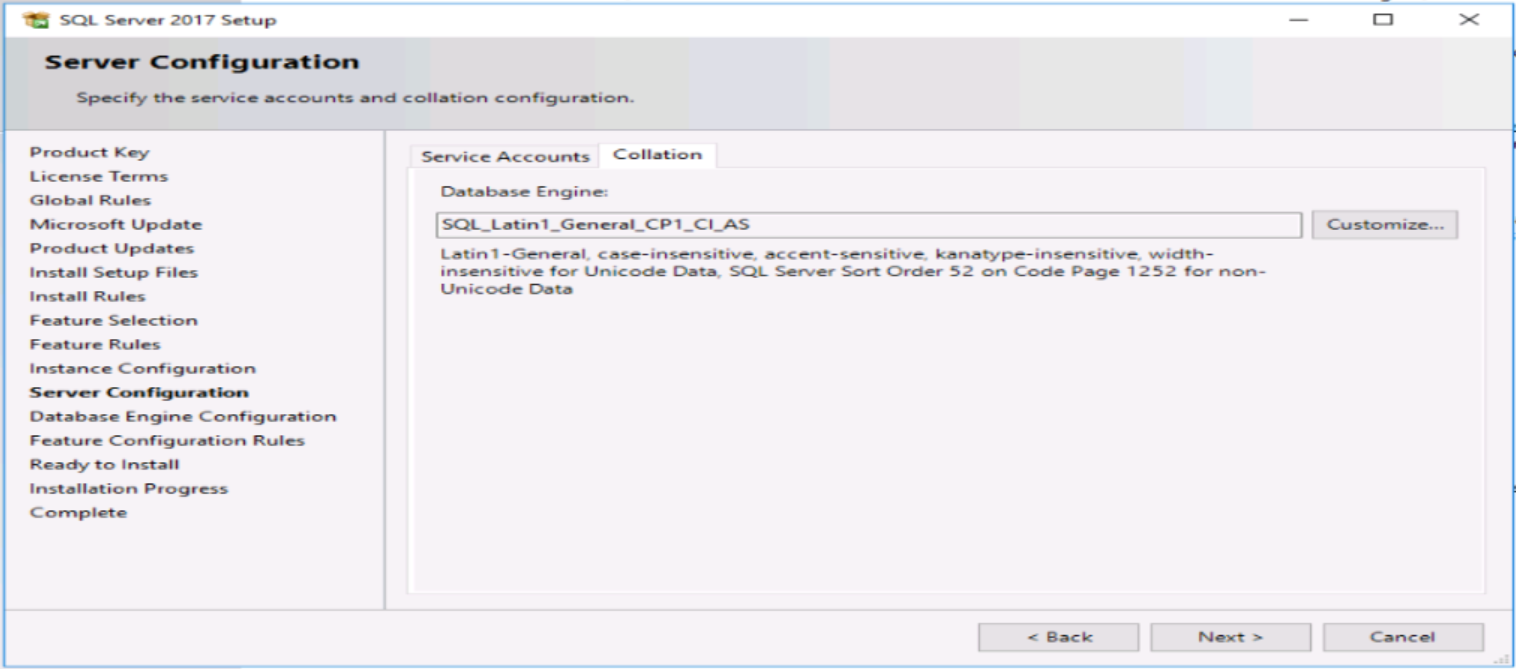
Define Collation ( Character set ) of SQL Server instance according to your application, software. This property cannot be changed after installation. So define it correctly.

You should specify Authentication mode of SQL Server in this step. I recommend choosing Mixed mode ( windows authentication and SQL Server authentication )
If you choose mixed mode, you should type sa account password.
You should add current user to the SQL Server administrators.


Specify data directories of SQL Server ( Data, log and backup directory ) like following.


Specify TempDB settings like following.


You can see summary of SQL Server 2017 installation in this step before installation start.


Click Install button to start installation.
Installation is completed thus, you can connect sql server 2017 by using SQL Server management studio.
Do you want to learn Microsoft SQL Server DBA Tutorials for Beginners, then read the following articles.
https://ittutorial.org/sql-server-tutorials-microsoft-database-for-beginners/